My least favorite thing to do is paint!
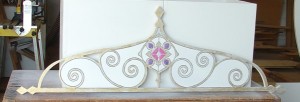
I did make this project somewhat easier by making individual components. This allowed for painting the components separately and applying them to the backdrop during installation. This also allows us to hide any screw holes during the installation process…we will layout our screw locations so that they will be hidden behind our applied components.
We began the painting process with 2 coats of KILZ primer followed by 2 coats of an off white for the backdrop, toy boxes and dresser.

The window trim, crown and small flourishes were given a gold finish.
The large flourish that spans the window trim has an off white base coat and was detailed by Jennie and Nat(what are daughters for…LOL!!!).
The textured curtains and dresser doors will be pink and the wheels for our carriage are stained with black walnut.

Part 3 of this project will cover the install and final placement of the various components…stay tuned!!


